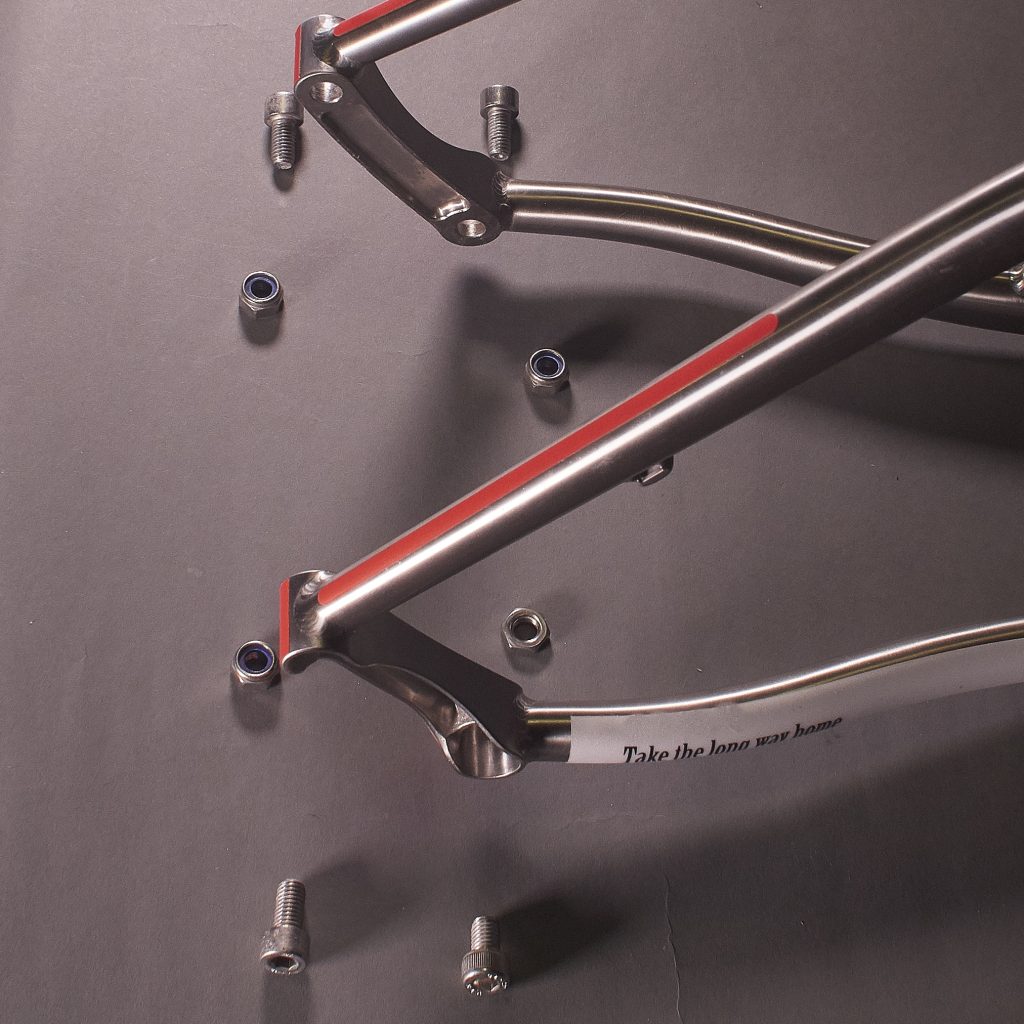
Locomotive was born with Siderod rear dropouts, designed to ensure maximum versatility and robustness.
The stop of the rear hub at the time of delivery is Boost® but thanks to the modular structure of the Siderods it is possible to insert special spacers that reduce the stop to 142/12 making the frame compatible with all the Gravel wheels available on the market.
Here is how to proceed to install the kit if your Scotsman, Westlander or Midnight Express is not yet equipped.
1- Remove the 4 screws (two on each side) that connect the Siderod dropouts in black anodized aluminum to the stainless steel frame: you need a 6 mm Allen key.
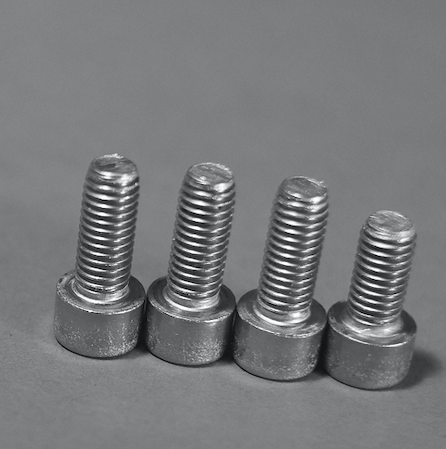
2- You will find yourself with 4 screws and 4 nuts. Put the dice on one side of the table and concentrate on the screws: you will find that there are three long and one short. Take one of the long ones and remove the rest from the table.
3- Open the box containing the kit and add the three screws contained to the one you kept: you will again have 4 screws, three of which are long and one short.
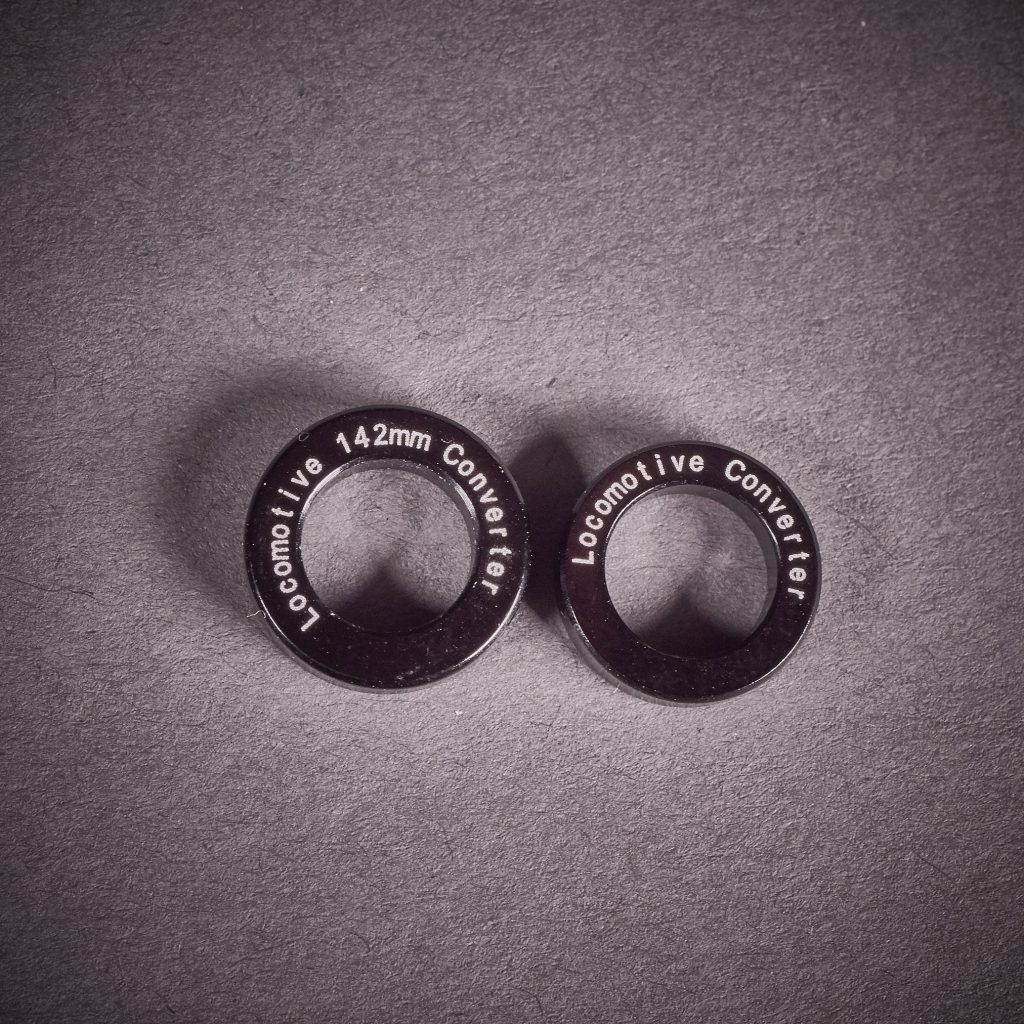
4- In the box there are 4 spacers that all look the same..but they are not: on 2 of these there is written 'Locomotive 142mm converter' while on the other two there is written 'Locomotive Converter'. They are NOT the same: those with 142 written on them are larger than about 1mm in diameter.
5- At this point you will find yourself with
3 long and one short screws.
3 dice of normal height and one thin
2 spacers with writing 'Locomotives 142mm converter'
2 spacers with 'Locomotive Converter' written
Now you can choose to mount everything and change the stop to 142/12 or reassemble while keeping the Boost® stop
7- Reassemble keeping the Boost® stop
a) insert the 2 'Locomotive Converter' spacers into two long screws
b) insert the other 2 spacers into the 2 remaining screws
c) take the short screw with the spacer and take the thin nut.
Screw the Siderod dropout into position by inserting the screw in the hole in the lower right (sprocket area) and using the nut
d) Take the screw and washer with 142mm written on it and screw the other siderod in position, in the bottom hole near the disk attachment
e) now screw the two screws with spacer remaining in the corresponding holes still free at the top.
Make sure that the spacers are in contact with the screw heads.
7 bis- Reassemble going to bar 142/12
a) take the short screw, the black spacer with the words 'Locomotive 142mm converter' and the thin nut.
b) Insert the screw in the hole of the frame in the lower right, sprocket area
c) insert the spacer into the screw that now protrudes from the opposite top and insert the siderod dropout on the screw. Stop everything with the thin nut.
d) Take a screw and insert it into the hole at the bottom of the disc attachment side. Insert the spacer with the words 'Locomotive 142mm converter', insert the dropout and stop everything with a nut.
e) Take one of the two remaining screws and insert it into one of the two free holes. Insert a spacer with 'Locomotive Converter' written on it, insert the siderod and stop everything with the nut.
f) Take the last screw, insert it in the still free hole, insert the last spacer with the words 'Locomotive Converter', insert the Siderod and stop everything with the last nut.
8- Make sure that the four screws involved are tightened at 8nm.